Deploying a web-application using Nginx server and Reverse Proxy.
I am a recent graduate with a Bachelor of Engineering degree in Computer Science and Engineering from SG Balekundri Institute of Technology, Belagavi. During my academic journey, I maintained an impressive CGPA of 8.6, which reflects my commitment to academic excellence. I also have experience in designing and deploying various personal projects that exhibit my proficiency in AWS Services, Python, and CI/CD and devops tools.
What is Nginx?
Nginx is a popular open-source web server software which serves its clients web pages. Suppose you want to access some website (www.google.com), when you put this web address in the browser you will see the homepage(web-page) of google. Web server serves the web files i.e. the HTML, CSS, Javascript files to the client i.e. user.
In short it is a web server which serves the web pages to its clients as per the need and requirement.
Nginx is compatible with multiple operating systems, including Linux, Windows, and macOS, and it is commonly used alongside other web technologies such as PHP, Python, and Ruby on Rails.
Why Nginx ?
High performance: Nginx is known for its high performance and low resource usage. It is designed to handle a large number of concurrent connections and requests, making it a great choice for high-traffic websites and web applications.
Scalability: Nginx can be easily scaled horizontally by adding more servers to handle increased traffic. It also supports load balancing, which distributes traffic evenly across multiple servers.
Flexibility: Nginx has a modular architecture, which means that it can be easily extended and customized with various modules to suit different needs.
Security: Nginx has built-in security features such as SSL/TLS encryption and support for secure communication protocols. It also has the ability to block malicious traffic and prevent common attacks such as DDoS attacks.
Ease of use: Nginx is relatively easy to set up and configure compared to other web server software.
Architecture of Nginx

workflow:
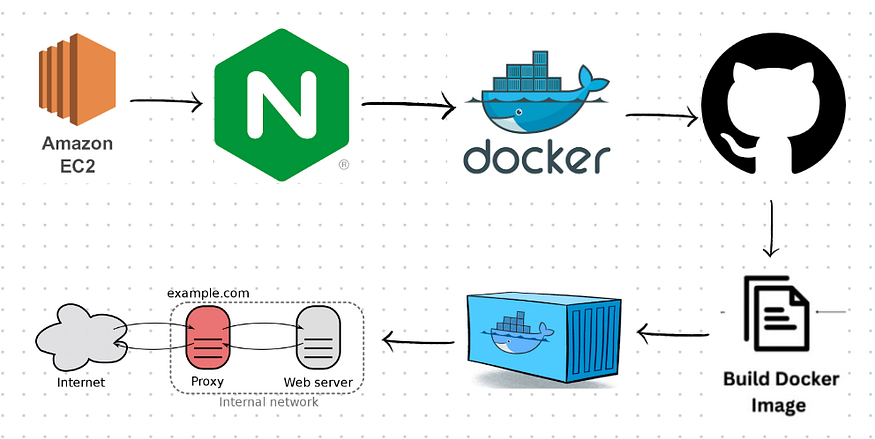
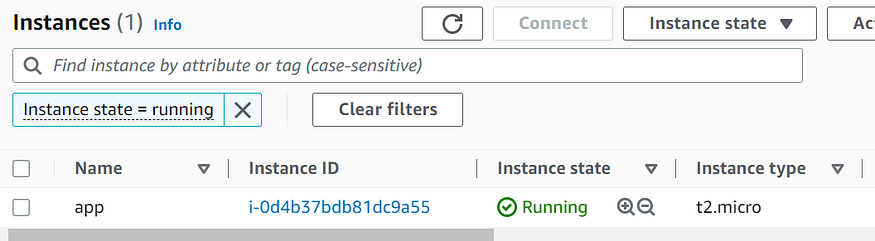
First you need to create an AWS EC2 instance. I have selected Ubuntu image while creating the EC2 instance. Add inbound traffic rules for HTTP, and HTTPS.
Repository Link :https://github.com/santosh-nellagi/node-todo-cicd.git
After this SSH into the instance.
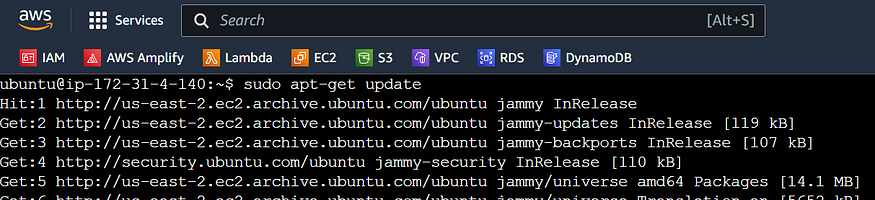
Then you need to update the instance. Use command :
sudo apt-get update
Now we need to install Nginx. Use command:
sudo apt install nginx

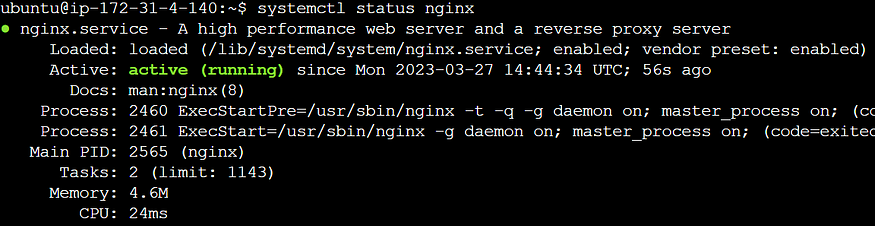
Check if the Nginx is in running state. Use command:
systemctl status nginx
systemctl restart nginx
(if asked for password do sudo systemctl restart nginx)
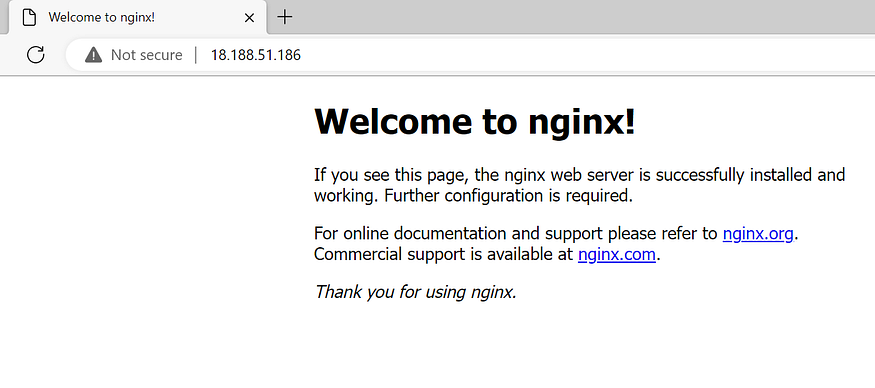
Also you can take the public IP of the server and try accessing it in browser,to check if the Nginx is installed properly.
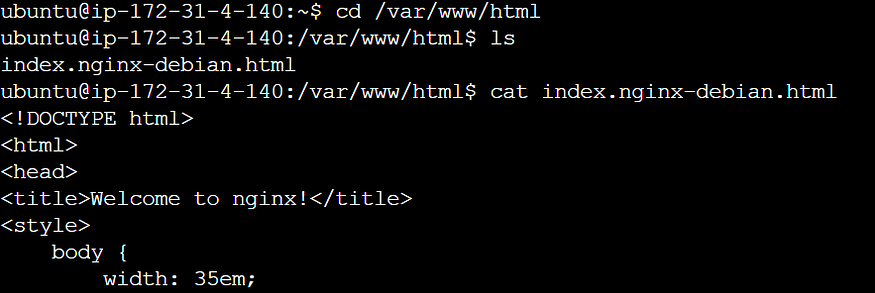
This page is been accessed from /var/www/html
You can check the Nginx configuration files here:


If you want to deploy some application you can go to /var/www/html and create an index.html file and add your html code and and you can access the same using the public IP of the server.
Check on the browser by putting the IP address. You will see below home page.
Now clone the source code repository. Use command:
git clone https://github.com/santosh-nellagi/node-todo-cicd.git
Now install docker. Use command:
sudo apt install docker.io
Check docker status:

Now check if docker is working fine.

Permission denied because this user doesn’t have access to docker . So we will give this user permission. Use command:
sudo usermod -aG docker $USER

$USER == current logged in user
After this reboot the server.
sudo reboot
Here is the Dockerfile :
FROM python:3.9

WORKDIR /app/backend

COPY requirements.txt /app/backend
RUN pip install -r requirements.txt

COPY . /app/backend

EXPOSE 8000

CMD python /app/backend/manage.py runserver 0.0.0.0:8000
Now we will start the build process of the application. Use command :
docker build -t notes-app .
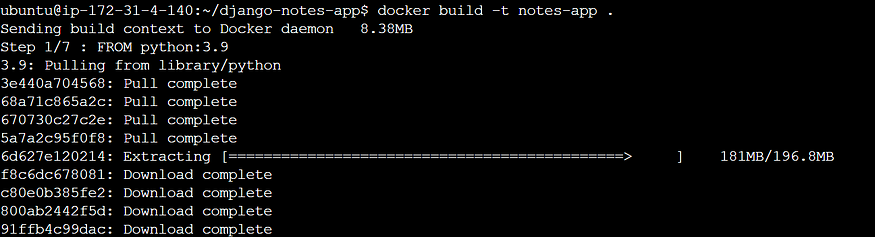
The image has been created successfully.

Now using this image we will create a container . Use below command:
docker run -d -p 8000:8000 notes-app:latest

Now do #docker ps and check if the container is created properly and it has been tagged to the 8000 port so that we can access the sameon that port.

This application is now running on the local host and we can check it using the command:
curl -L <local_url>:<External-Ip>
curl -L http://127.0.0.1:8000

But we want to give access to the application by using the concept of reverse proxy so that the clients can access the same.
For this we need to change the configuration of Nginx so for that go to /etc/nginx/sites-enabled

Now we will update the default file for changing the configuration.
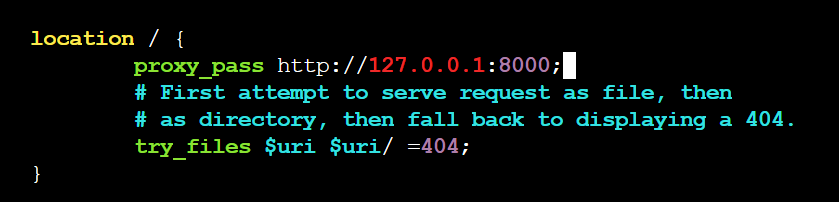
Here we have added a proxy address for the incoming traffic.
After adding this you need to restart the nginx so that the updates will work. Use below command to restart nginx.
sudo service nginx restart
Now you can access the application using the IP address.
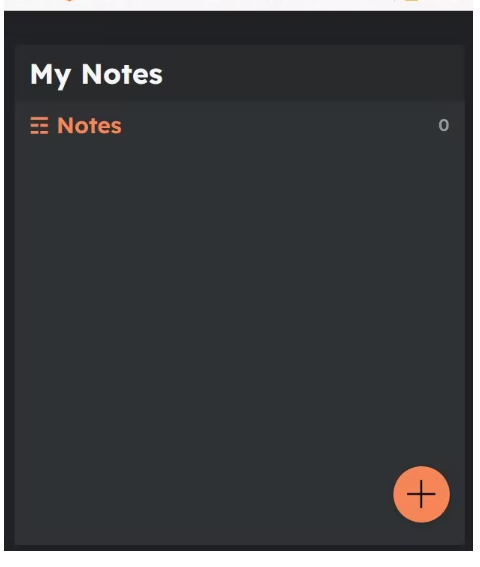
Now the app is accessible but we are not able to update or delete the notes here because the backend code is not updated here to store such data.
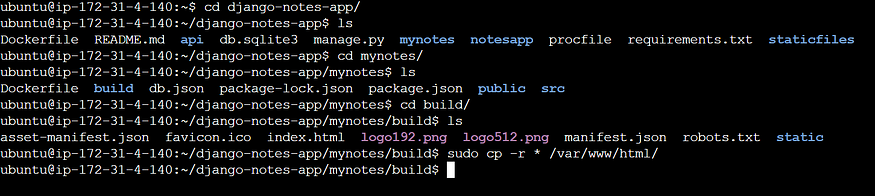
For this we need to copy all the static files of the application to the location Nginx root folder /var/www/html so that we can access it.
Use command :
sudo cp -r * /var/www/html/

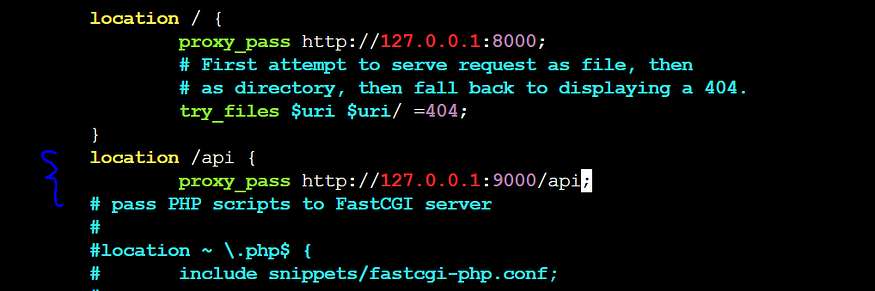
Now we need to update the location /api for the backend page of the server.
Go to /etc/nginx/sites-enabled location and update the code.
Save it and you need to restart the service.
After restarting you can go on the browser and check accessing the notesapp and try adding your notes in it. You will be able to do that.
In this way we did deploy our web application using the Nginx server.